 Fuel injected ATVs are becoming the norm on showroom floors these days. We have to admit that it’s awful nice to not have to babysit a choke knob for the first few minutes of your morning warmup, and to know that our EFI equipped engines will always be running in their sweet spot regardless of temperature or elevation. Still, many riders prefer a good old carburetor for a variety of reasons, and some have even removed their EFI components to go back to a carbureted engine. Whether your ATV was built from the factory with a carb or you’ve taken the liberty of returning it to that state, you’ll need to know a little bit about jetting.
Our TRX450R came from the factory jetted typically lean to meet government clean air emissions standards. We’re all for clean air, but our engine was so lean that it wouldn’t idle by itself when cold. It was almost impossible to ride without a good 5 minutes of running with the choke on and was less than a pleasure to ride even when it was warm! A re-jet was definitely needed. Chances are that if you have a stock ATV, you’re in the same boat. Read on and we’ll walk you through the steps to getting your engine the proper air/fuel mixture that’ll keep it in its happy place.
OK… WHERE’S THE CARB?
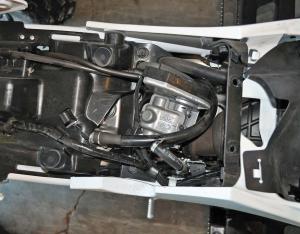
Gaining access to the carburetor is usually the toughest part of the job. They’re usually pretty well hidden under the fuel tank and surrounded by hoses, wires, the exhaust, and a million other things that’ll make you wish you have smaller yet stronger fingers. In our case, removing the fuel tank allowed much more access and mobility. If you don’t need to remove the tank, remember to turn OFF the fuel.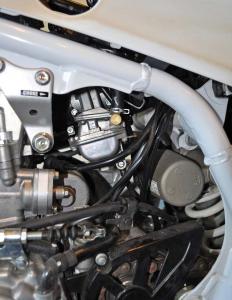
In some cases you might have to remove the carburetor to re-jet. On our Honda 450R and on most other machines, you can get the job done by loosening the clamps on the intake and airbox side of the carb and rolling the float bowl outward. This brings us to our first little morsel of advice we learned the hard way. PRICELESS TIP NO.1: A good screwdriver is worth its weight in gold at this point. Using a cheap, discount tool store screwdriver is a very good way to strip out those screws on the bottom of the float bowl, and if you do that… you’ll hate life! Even with a good screwdriver, take care to make sure you have good straight contact with the screw and put firm pressure into it before you turn.
INTO THE BOWL
Remove the screws from the float bowl and give it a tap on the side with the handle of your screwdriver to pop it loose if it doesn’t drop free by itself. At this point, if you haven’t drained the fuel already, it will spill out, so have a rag or absorbent mat underneath your ATV. Once the bowl is removed, you’ll be staring at the nitty gritty of your carburetor.
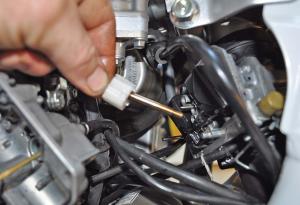
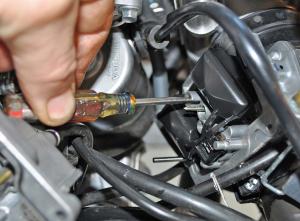
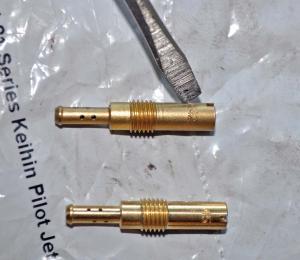
The main jet will generally be staring you right in the face since it is usually the centermost and lowest mounted jet. Often it will be surrounded by a plastic shroud that will either pull off easily or could be held in place by the main jet as in the case of our 450R. Sometimes when you remove the main jet, the needle jet will come out with it. Don’t worry - just separate the two and re-install the needle jet up into the carb body. The pilot jet is sometimes exposed in the float bowl, but in the case of our Keihin, the pilot jet was mounted up inside the casting just forward of the main/needle jet tower. It can be removed with a small flat-blade screwdriver. The pilot jet is the one that controls low RPMs such as idle.
PICK A NUMBER
Stock jet numbers on our 450R were a #42 pilot and a #122 main jet. Our biggest complaint was the lack of idle and low-end performance, so we definitely wanted a larger pilot jet. We picked out a #45 and installed it back into the carb. We also planned on opening up the airbox a bit on our machine, so our main jet size would need to be increased significantly, and our final setting ended up being a #155. This is where we’ll mention PRICELESS TIP NO.2: Make sure to not over-tighten the jets! “Snug” is good, but reefing on a brass jet is a sure way to break it off inside the carb and at that point, you’ll be hating life - again!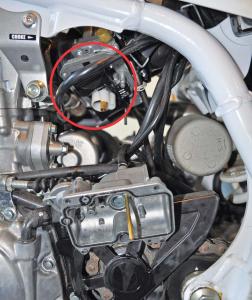
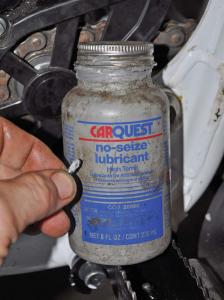
Once your jets and shroud are re-installed, you can replace the float bowl and screws. PRICELESS TIP NO.3: Use a little bit of anti-seize on the screws. This will pay dividends if you ever have to remove the bowl again after your ATV has seen its fair share of mud, water, and grit. Snug up the float bowl and you should now be ready to rotate the carb back into place, reinstall the hoses and tank, and turn on the fuel. Reinstall any plastic that you removed for access and you should be ready to test fire. FIRST, though, make sure that your throttle cable is properly situated so that it functions well with no sticking even when turning the handlebars.
NEW FOUND POWER
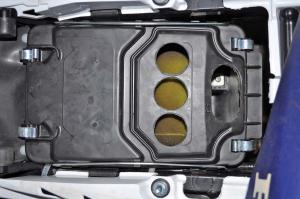
We hit the start button and our 450R fired right to life better than ever before and actually idled without stalling! A stab at the throttle brought our engine to a healthy roar where it would just cough and stall with stock jetting. After a minute of warm up (without the choke on full this time!), a rip across the yard let us know that our drilled airbox lid and jetting changes had really brought our Honda to life! It seemed like we had twice the power and our engine revved quickly without hesitation or flat spots. This was now an ATV that we could really enjoy riding!
If you plan to perform modifications such as a pipe, airbox mods, or motor work, jetting will be absolutely necessary, but even a completely stock ATV can benefit from jetting updates. Not only will it make a difference in ideal conditions, but it could be the extra insurance you need to keep your machine running at all times regardless of weather and temperature changes, and it could protect you from expensive engine damage.
JETTING TIPS
Things that cause mixture to go lean:
COMMON SIGNS of LEAN JETTING to LOOK FOR:
- Surging
- Popping
- Backfiring/stalling
- Light brown/white spark plug electrode
Things that cause mixture to go rich:
- Higher temperature
- Higher altitude
- Less ethanol
COMMON SIGNS of RICH JETTING to LOOK FOR:
- Blubbering
- Won’t rev out
- Black spark plug electrode


